
YOUR CART
- No products in the cart.
Subtotal:
$0.00
Click here to see detailed information about the product
| Manufacturer | Tides Marine |
|---|---|
| Product Code | SLIDES |
| Product Line | SLID |
| Slide Type | Stainless Steel, Stainless Steel Machined (SM), Naval Brass |
Price Price range: $96.96 through $103.49
Description
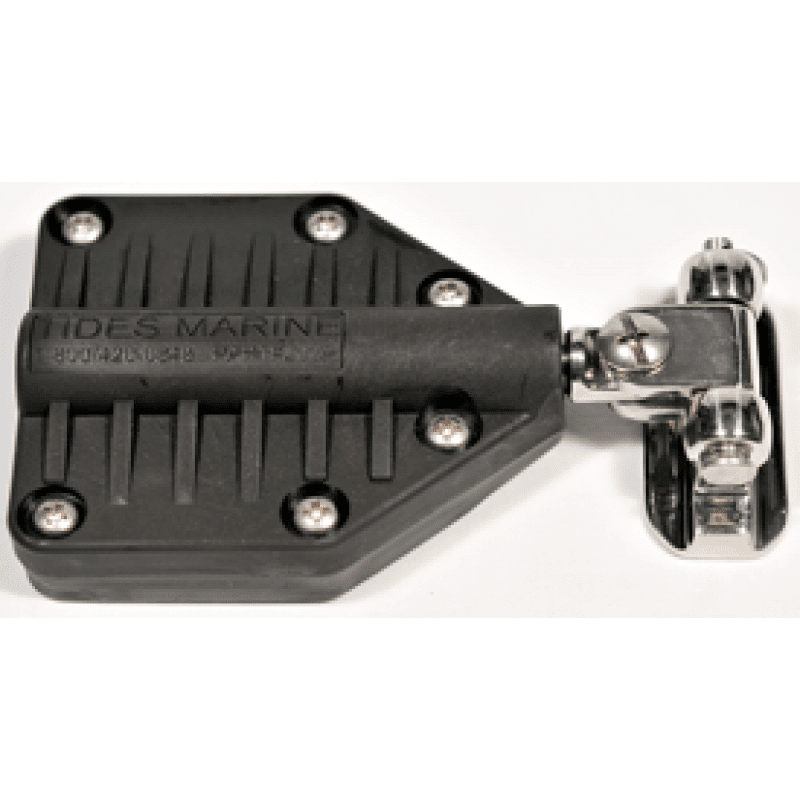
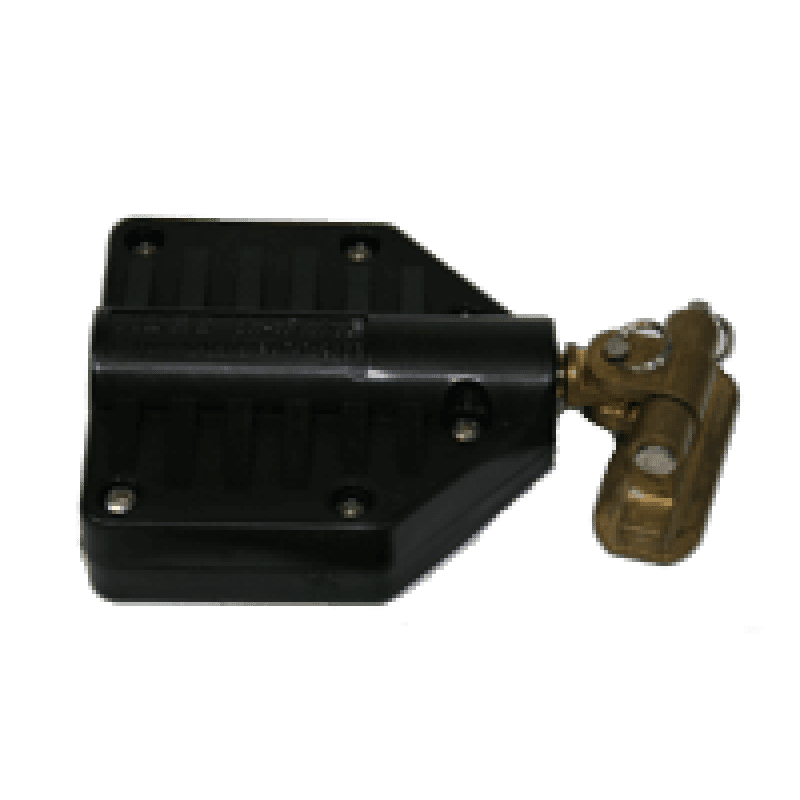
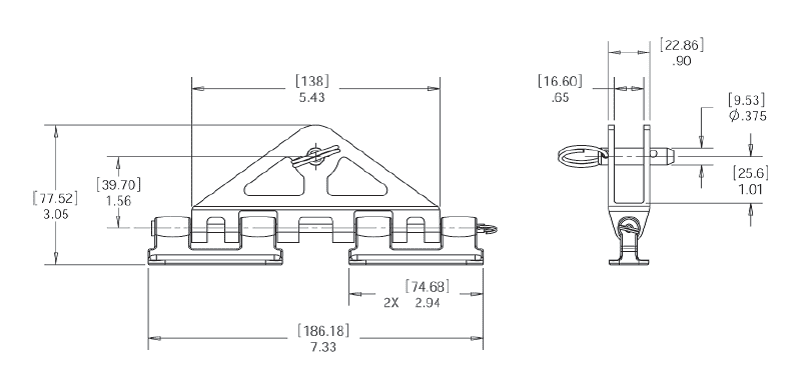
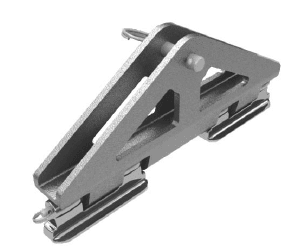
SH-200A – Tides Marine Small Batten receptacle with an SH-400 slide.
This receptacle accepts flat battens up to 1 5/8 inch wide, and up to 1/2 inch in diameter.
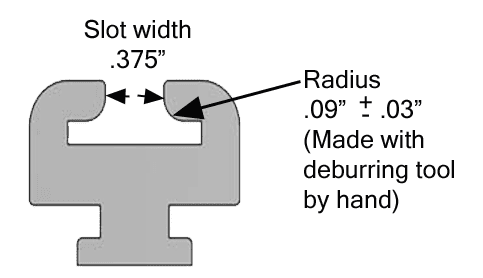
If your Track System was purchased PRIOR to 2006, you will need to order “SM” stainless steel slides.
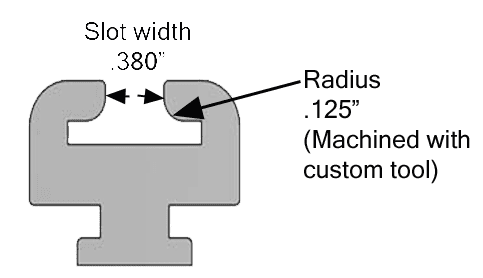
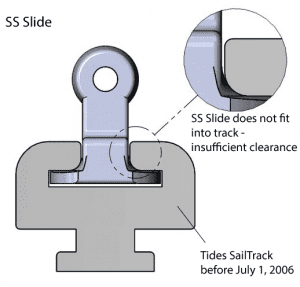
If your Track System was purchased AFTER 2006, you will need to order “SS” stainless steel slides.
In 2006, Tides Marine improved the consistency of the internal shape of the SailTrack when they changed the shape of the knives used to machine the track shape. This eliminated a step that was once done by hand.
This modest change to the track also required an associated change in sail slides that are made from stainless steel. Please see below.
| Track & Slide 1995 thru June 30th 2006 | Track & Slide After July 1st 2006 |
|
|
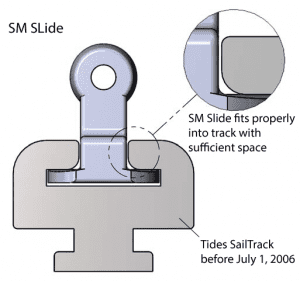 |  |
If the serial number on your sailtrack is 44229 or smaller, your track was produced BEFORE July 1, 2006 and it requires stainless-SM Series Slides.
If the serial number on your sailtrack is 44230 or greater, your track was produced ON or AFTER July 1, 2006 and it requires stainless-SS Series Slides
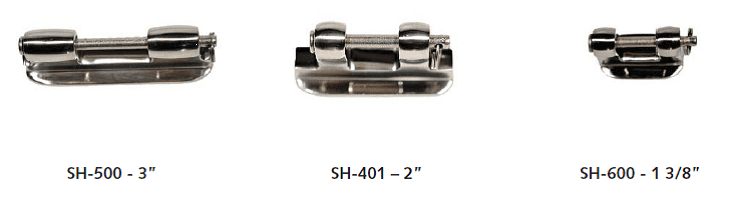
Most conventional headboards have a “length along the luff” of 12″ or less. This type of configuration should only require one (1) Tides headboard slide (SH-500) fastened / webbed to the middle of the headboard.
Longer headboards may require two (2) Tides headboard slides – one at the top of the headboard and one at the bottom.
Multi-hull sailboats sail much stiffer than monohulls. If you are fitting a Tides Track System to a multi-hull, you may wish to consider one of the SH-900 headboard car assemblies.
The price of these SH-900 units is in addition to the standard cost of the Tides Track System.
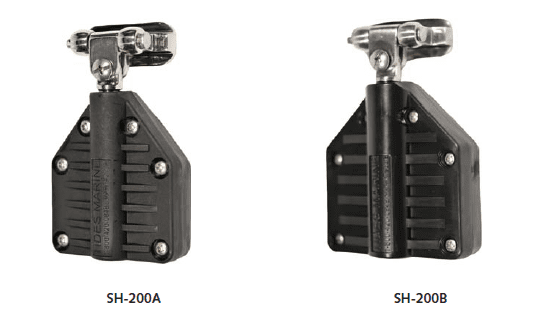
Tides offers two batten receptacles with its track system.
If you wish to use your existing batten receptacles (or those of a competitor), this is possible assuming these receptacles connect to corresponding slides with a 10mm stud.
Simply order an SH-400 (below) for each of the receptacles you wish to use. Turn the 10mm stud into “your” batten receptacles and the Tides System will take care of the rest.
Count the number of reef points on your sail. A Tides SH-401 slide should be used above each reef point (or cringle). However, if the slide above the reef point is a batten receptacle with a Tides slide, this step is not necessary as the SH-401 is already part of this batten receptacle assembly.
Count the remaining existing slides on your sail. These will be replaced with the Tides SH-600 intermediate slides.

Summarize all of the slides you have selected and determine if the total falls within the “one slide for every 2 to 3 feet of track” guideline.
If so, complete the slide section of the Order Form at this time.
If you will need more slides than those which are offered with the standard Tides Track System, contact your loft or Tides Marine for information on how to order additional slides at the regular Retail Price.
Now is a good time to total the length of each Tides slide you have ordered to determine a final slide stack height. Compare this stack height to that of your current slides. If the Tides stack height is longer than your original stack height, your sail cover may need to be modified.
All batten receptacles will use the SH-401 slide.
If your current slides are webbed to the main (or some sort of shackle is used), simply remove the old slides and replace them with the Tides slides. This is covered in more detail in the Sail Track Installation Instructions.
If your existing slides are sewn to the luff or you have a bolt rope, your sailmaker will have to sew web loops onto your sail to complete this installation.
Tides Marine has developed a new line of headboard car assemblies to accommodate the heavier loads being developed on multi-hull vessels with mainsails larger than 500 square feet and monohulls with mainsails larger than 700 square feet. These increased service loads are a result of new sail designs which have much larger roach area and wide head (or fat head) shapes.
If one or more of the standard Tides headboard slides pull out of the Tides track under load, one of these alternate headboard cars could be the solution.
These alternate headboard car assemblies can also be used if the halyard sheave is positioned aft/away from the luff groove or when a masthead crane is used. In these instances, raising the main the last few feet up the mast may result in the slides being pulled away from/out of the Tides Track. Other steps that can be taken to reduce this possibility include:
The alternate headboard car assemblies described hereafter are sold separately.
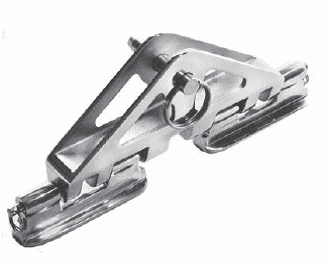 | SH-910-SST Headboard Car AssemblyTwo stainless steel slides each measuring 3.00″ in length spaced approximately 1 1/4″ apart. Width of the headboard slot in the car is approximately .650″. |
 | SH-930 Headboard Car AssemblyTwo stainless steel slides each measuring 3.00″ in length spaced approximately 2 1/4″ apart. Width of the headboard slot in the car is approximately .650″. |

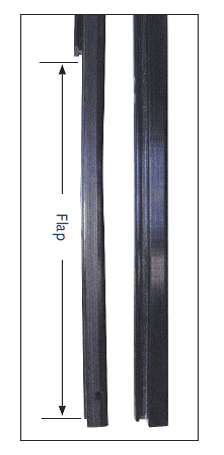
This creates a section on the Tides Track we call the "flap". This flap contains either one-hole or two-hole backing plates. The final step of each installation calls for the installer to snug these backing plates into place, which locks the flap (or base of the track) in position on the mast.

Making this flap an integral part of the whole Tides Track allows you to stack your sail slides below your current mast gate and above the gooseneck. This minimizes sail slide stack height of the Tides System.
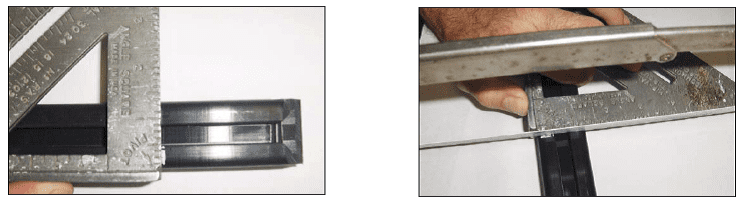
Step 4: Using a carpenter’s square or other straight edges as a guide, cut the top of the track at this mark preferably at a 45-degree angle like the original. You may use a miter box to help with this.
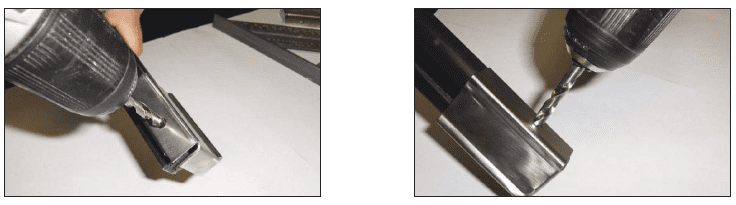
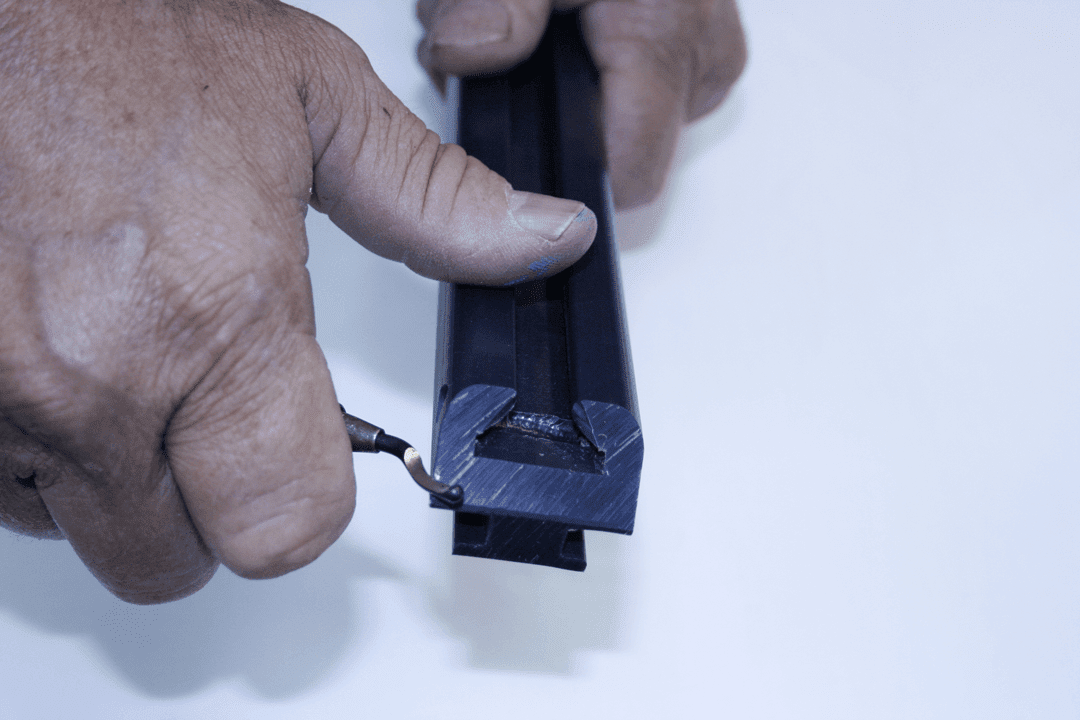
Step 5: In the hardware kit you will find a stainless steel cap approximately 3" long. There are two holes in this cap, one on either side. Press the cap over the top of the track and use it as a guide to drill a hole for the quick pin. Use a 1/4" drill bit and drill a hole athwartships.
You may find it easier to drill halfway through the track from one side and then finish the process from the other.
Step 6: File / trim the leading edges of the top of the track until they are smooth and clean.
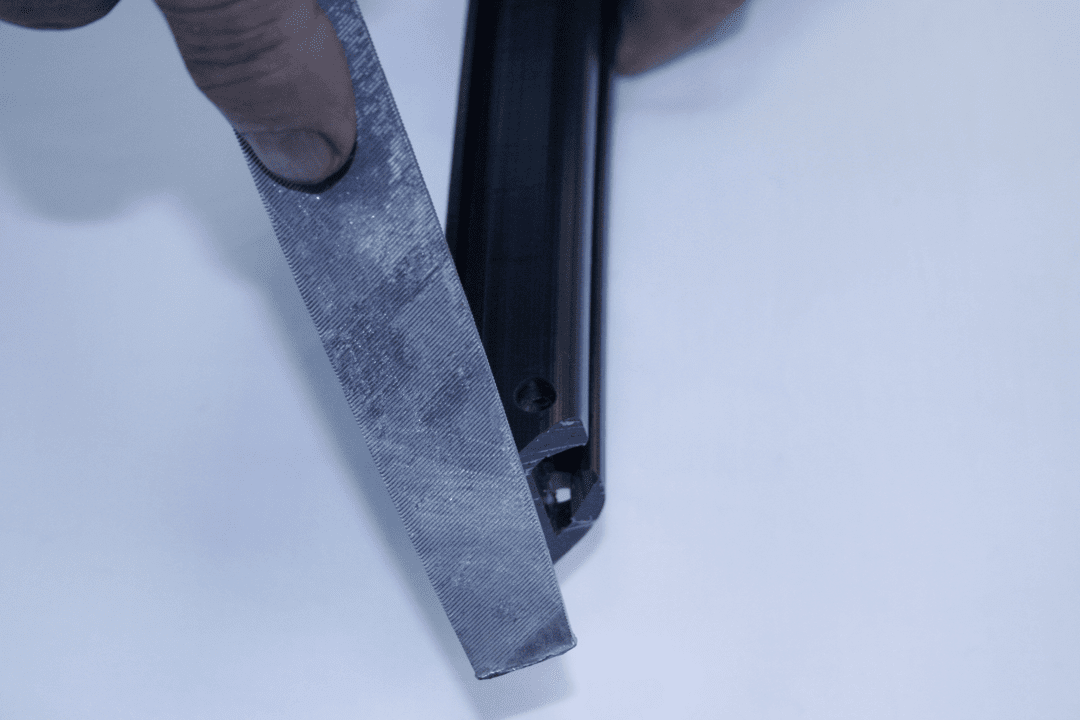
Step 7: Install the quick pin in the hole at the top of the track.
Step 8: Insert the top of the track into the mast gate and push the Tides Track into position. You can now follow the installation instructions that came with your order.
If the Tides Track is too short, Tides Marine can provide a small section of track to correct the situation.
Tides will need to know the length of the extension track required (no more than 18” is advisable). To determine length required:
1) Push the Tides Track up the mast until the top of the track is 2" from the halyard sheave.
2) Tape or clamp the Tides Track to the mast.
3) Measure from the bottom of the Tides Track to where you want the extension track to stop. Add three inches for the removal of the mast gate at the bottom of your existing Tides Track. Is the gate in your mast visible?
4) Call Tides with this information.
Step 1: Tides will cut the required section of track, trim the back of the track to fit your mast and attach two stainless steel connectors to the top of the new track piece.
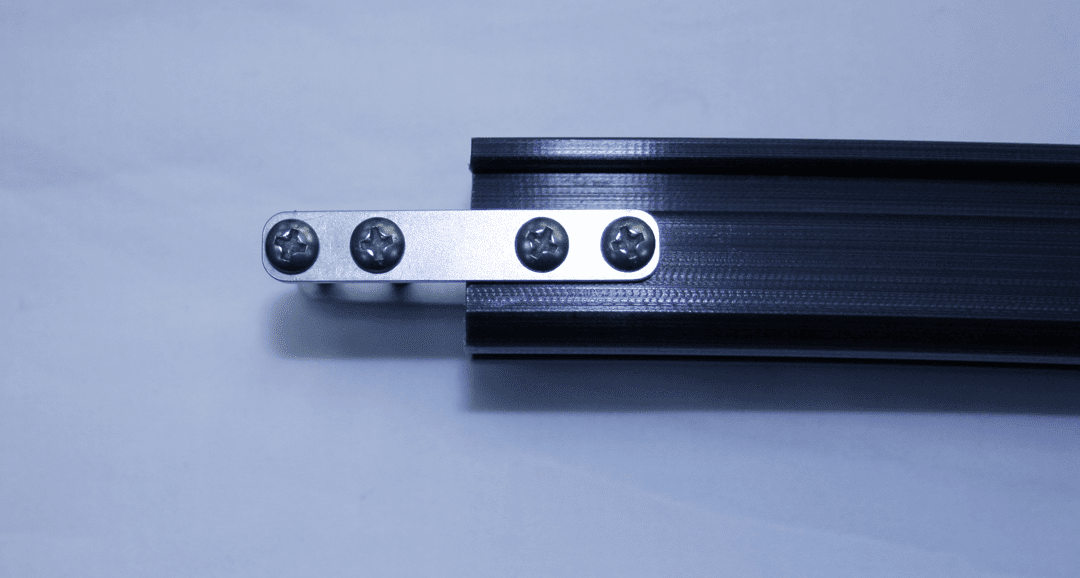
Note: These connectors make it possible for you to simply butt the new piece of track to the existing (or primary) piece of track on the mast.
Step 2: Cut the existing mast gate from your track squarely, then chamfer the mating ends of the track pieces. Slide the extension track into the luff groove and butt it up against the existing Tides Track. Snug the backing plates.
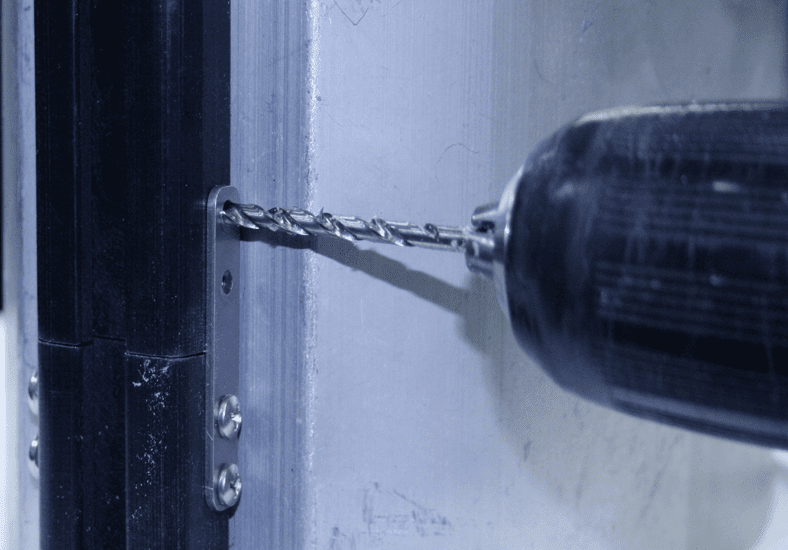
Step 3: Position the connectors over the existing piece of track. Using the connectors as a guide drill two (2) holes in the base of the existing track using a # 29 drill bit (.136"). The holes in the connectors are 9/64". You may find it easier to drill halfway through the track from one side and then finish the process from the other.
Note: To ensure a tight joint, DO NOT drill oversized holes In the existing Tides Track. Make sure you have the correct drill bit before proceeding.
Step 4: Insert a bolt (provided) in each of the two holes. Snug a nut over each of the bolts.
Step 5: Position the joined track pieces where you want them on the mast. Tighten all backing plates and connector nuts.
Step 6: Insert your slides through the new mast gate in the base of the extension track.
Step 7: Position the stainless cap over the end of the Tides Track and insert the quick pin.
Note: The slides should move smoothly through the stainless connectors and over the joint in the two-track pieces. If they don’t, contact Tides Marine for further assistance.
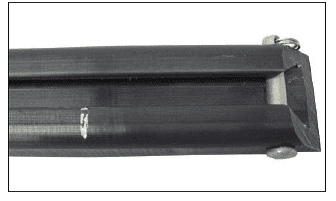
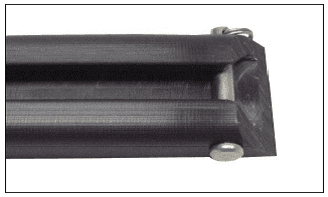
Each Tides Track System comes with a sample piece of track approximately 3" – 4" in length. This sample piece is exactly the same shape as the full-length piece of track in your order.
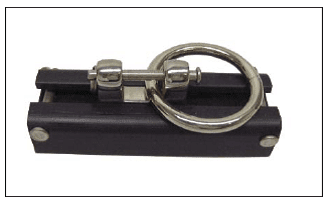
Tides "pins" each end of this sample track and puts a small intermediate slide between the pins. In the slide, you will find a large stainless ring.
Before you install the actual Tides Track in your mast, slide this sample piece of track into your mast gate and up the luff groove. Attach your halyard to the stainless steel ring. Also, attach a small retrieval line to this ring.
Using the halyard, raise this sample track to the masthead to make sure the actual Tides Track can be installed over the entire length of the mast.
Using the retrieval line, pull the sample piece of track back to the mast gate.
If the sample piece of track does not move all the way to the masthead, neither will your Tides Track.
Position the sample piece of track as well as you can against the top / bottom of the mast gate.
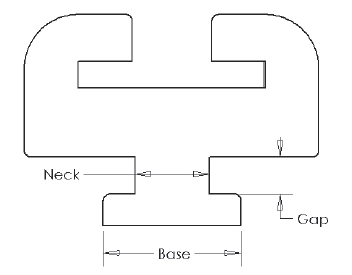
1. If the track section "neck" is too wide to fit in the luff groove, or,
2. If the track section "gap" is too tight on the edges of the luff groove, or,
3. If the track section "base" is too wide to fit within the luff groove.
Once you’ve determined which dimension is causing the problem, use the blue measurement disks (provided with your order) to re-measure your luff groove shape. Contact Tides to determine if you can trim your track to fit in your luff groove. If a replacement order is necessary, you will be responsible for a 15% re-stocking charge.
The Tides Track is available in seamless lengths up to 65'.
Most track systems have track lengths running between 38' and 45' in length.
Monohulls
The average sail area supported by Tides Track systems is between 450 and 700 square feet.
The maximum sail area using the Tides Track system is found on a Camper-Nicholson "day boat" in the Seattle area. The total area of the main is almost 1,000 square feet. This boat sails within a defined area from its mooring and rarely sails in winds in excess of 25 – 30 knots. It is never out overnight.
Today’s full–battened mains often have more roach than the average sailing vessel of 15 years ago. This type of sail shape puts far more load on the Tides Track and rigging.
If you have any questions regarding your particular application, please contact Tides Marine.
Multi-Hulls
The average sail area supported by Tides Track systems is between 350 and 600 square feet. Multi-hulls sail much stiffer than monohulls. This, coupled with the large roach area on the sails of today’s multi-hulls, places far greater load on the Tides Track system.
Many multi-hulls require the use of an alternate headboard car
(see Alternate Headboard Cars.) The loads created by large roach areas and full battens can cause conventional Tides Marine headboard slides to pull out of the Tides Track while underway.
Storm Tri-Sail Track
Tides recommends that its track system not be used to support storm tri-sails. When these sails are deployed, weather conditions are abysmal.
Select at least 2 products
to compare